
Publishing Your Android Library with Maven Publish and GitLab CI
6/12/2023

What Are Android Libraries?
Library projects are the backbone of Android app development. There are many open source libraries that are essential to cutting down boilerplate, and speeding up application development on the Android platform. Many are even endorsed in official documentation, and some are actively maintained by Google themselves. Some examples you may be familiar with are Retrofit, Dagger, and Glide.
Our Tools
If you've ever had an idea for a library project to add to the existing open source ecosystem, or just wanted to build something quick to help you across different apps that you might be developing, this guide is designed to show you the basics of setting up a library project and maintaining it. We will be using GitLab for this guide, because they offer a free package registry in every repository for your projects. Also, we will be using advantage of their continuous integration system to automatically build and upload new versions of our library when we merge into the main branch. However it is important for me to note that there are official Maven repositories, like Maven Central, that are recommended to use for your open source projects if you plan to make them generally available to the public. If you are interested in hosting your project there, OSSRH offers a publishing guide that details how to get started.
Creating The Library
For now however all you will need is Android Studio and a GitLab account to follow along with this guide. So let's get started with project creation:
| Part 1 | Part 2 |
|---|---|
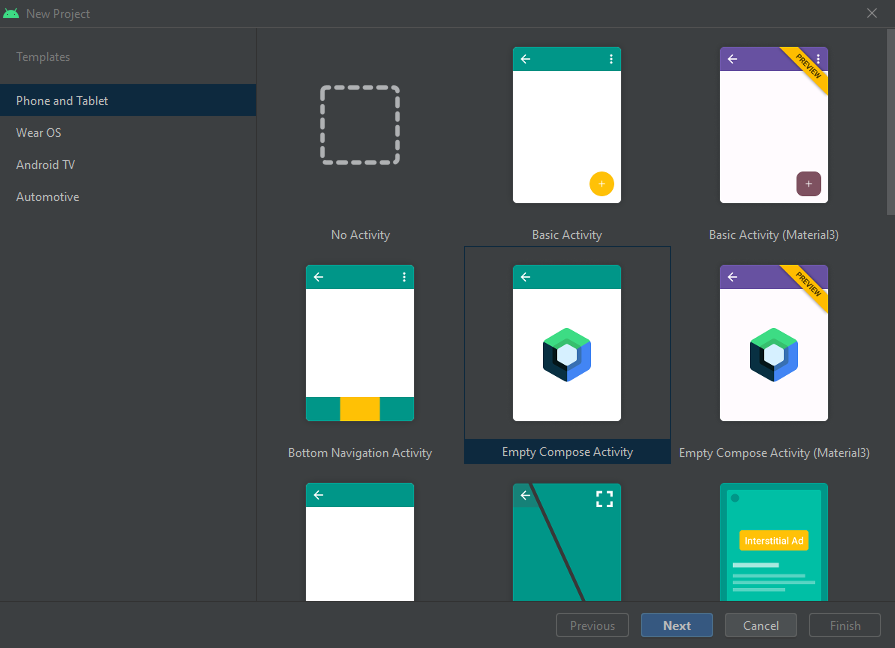 | 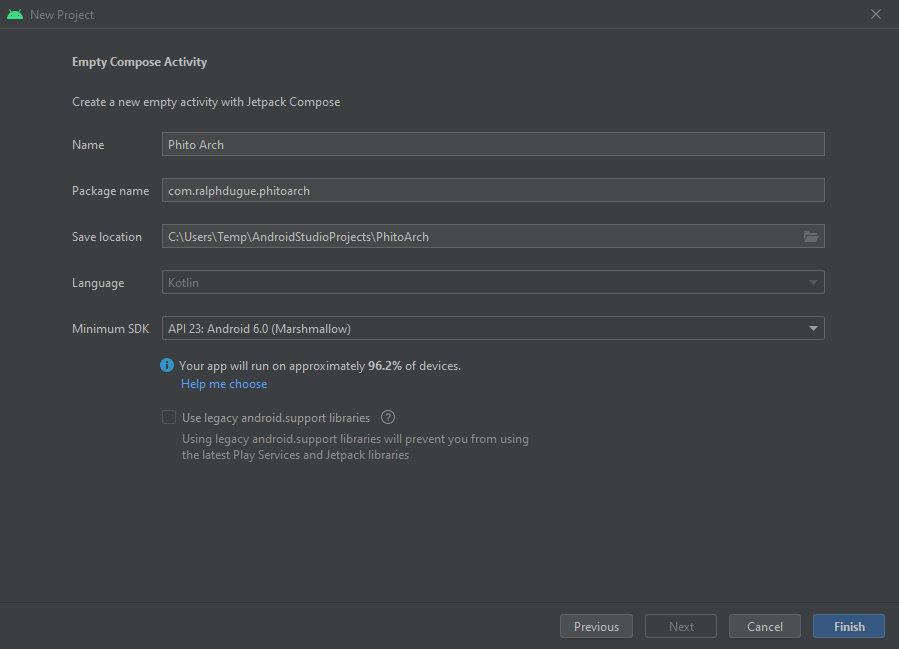 |
There currently isn't a way currently to create a library project from Android studio, so start with an empty activity project or an empty compose activity project. fill out the usual project specifications, and create the project. Our next step will be to go into the app level gradle file, and convert the module into a library module. At this time we can also add the Maven Publish plugin to our project:
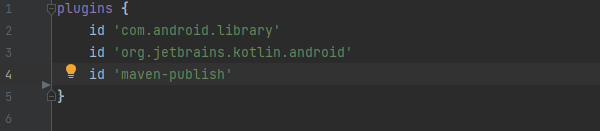
That's all there is to creating a library module! Now this module could be added to another app module in this project for example, but that's not what we're going for. What we want, however, is a dependency that can be pulled from a repository like we're used to doing with Gradle.
Create The Publication
So next we need to create the Maven publication that we will be publishing to:
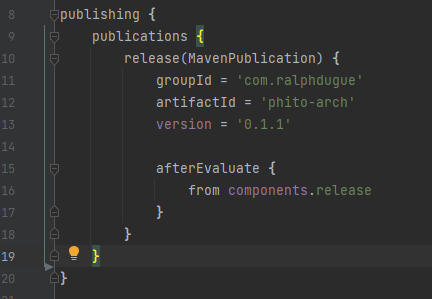
Here we create a publication block inside the publishing block that defines identifying information about our publication. The version field is important to note, as we will want to increment it with every new version of the project. Next we need to add the repository we will be publishing our library to to the publishing block:
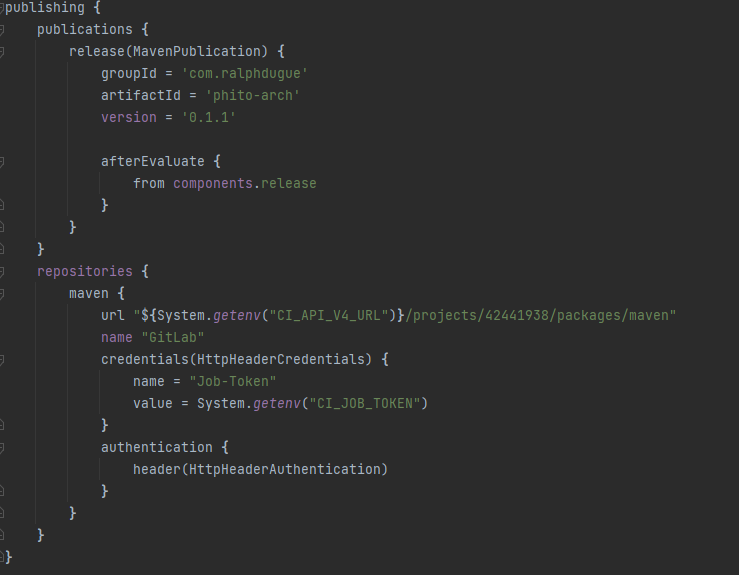
We create a repositories block inside the publishing block to define the repositories we would like to publish our package to. In this case we just have one repository which is in the GitLab repository that our project is hosted on. We use two system environment variables that are predefined by GitLab:
- CI_API_V4_URL - This is the home URL for the API of the GitLab server. Whether this is a self hosted instance, or the official GitLab server API, you can use it to make calls once authenticated. In this case we are using it to build the URL for the Maven package directory of our project. The 8 digit number refers to the project ID which is available under repository home page.
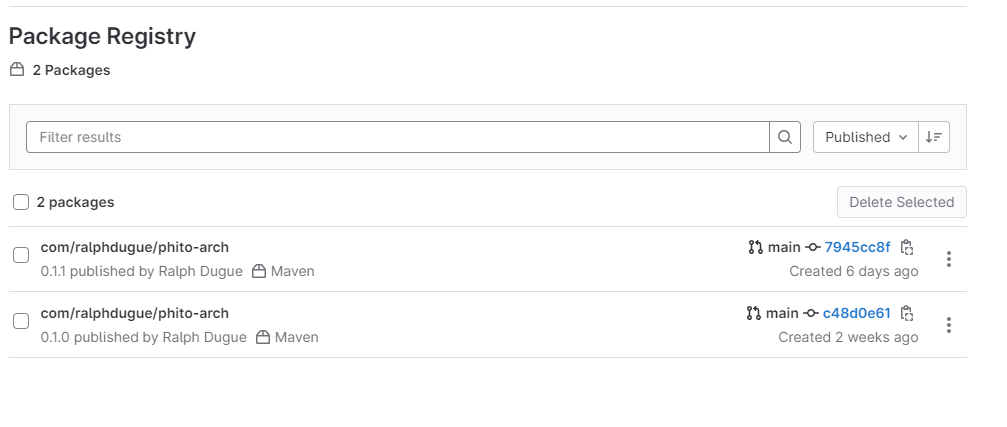
- CI_JOB_TOKEN - This is a token used to authenticate certain API endpoints. It is just one of the forms of authentication offered through GitLab. For more options on authenticating Package registry calls, check out the documentation. Now when we run the gradle publish command, our library will be published in the package registry of our project. Here is what this will look like:
Adding The Library to a Project
This section should be very familiar if you are used to working with third party libraries. If we click one of the packages, we can see the details including installation instructions:
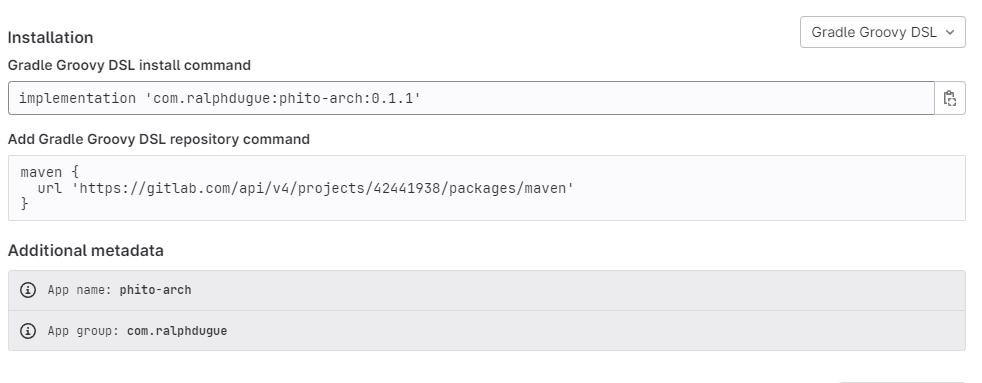
Now we just need to add the repository to the repositories section of your project's settings.gradle file:
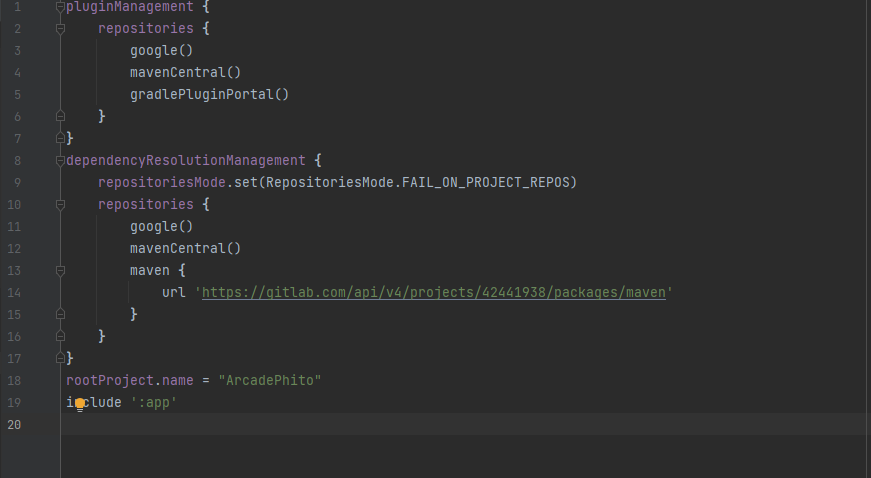
This is everything We need to know on how to publish a library! Adding it as a dependency to your Android modules is now as easy as copying and pasting the implementation line in the above example. As a little bonus now we will add some continuous integration to our project.
Continuous Integration
As stated earlier, we could just manually use the greater published command to send new versions of our project to the package registry. However, It is much more efficient to have some kind of continuous integration pipeline To automate the process. This is especially useful for projects that scale in size and complexity. There are a lot of different tools out there, but I find GitLab CI very easy to use, and well documented. And since we're already taking advantage of the package registry it offers, we might as well use this to simplify our lives. For now we're going to use a simple implementation:
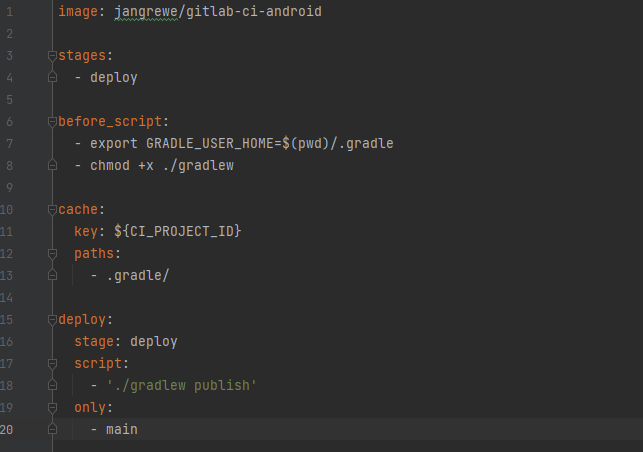
This is the gitlab-ci.yml file which goes In the root directory of our project. When we push to our get lab repo, it will read this file to see what instructions to follow depending on what branch we push to. In this example we only have one stage, deploy, that we use to publish our library with the command. We also use the only instruction to make sure this command only triggers when we push changes to our main branch. We could for example add a testing stage just for running unit tests, but this project currently doesn't need that.
Conclusion
This is all we need to manage our own Android Library repository. The project I am using in this example is just a simple utility library I am working on to help speed up my own development. It's still a work in progress, but feel free to check it out. It focuses on common boilerplate code for Jetpack Compose projects.